[How To] - Enable USB Debugging in Kindle Fire
Developers may notice that the Amazon Kindle Fire doesn’t come with a USB Debugging setting. There is no way to enable USB Debugging on the actual device to allow you to connect it to Android development tools. There is a hack available to make it work though.
Note: This tutorial assumes you have the Android SDK and platform tools installed.
Windows
1. Download and extract the Google USB Drivers.
2. Replace the android_winusb.inf file in the Google USB Driver folder with this one.
3. Connect your Kindle Fire. When it prompts you for a driver, point it to the Googleusb_driver folder. If Windows has already tried to find a driver, right-click My Computer/Computer then select Manage > Device Manager > Other Devices, then right-click Kindle and select Update Driver Software…
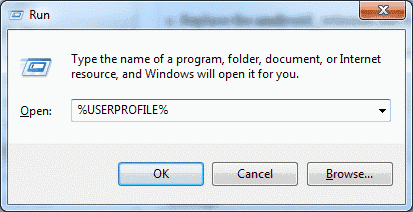
4. Hold down the Windows key and press R to bring up the run dialog and type %USERPROFILE% then click OK.

5. Open the .android folder.
6. Open the adb_usb.ini using Notepad or Wordpad.

7. Type 0X1949 at the end of the file, then save and close adb_usb.ini. (Note, some people are saying the ‘X’ has to be upper-case in order to work. See comments.)

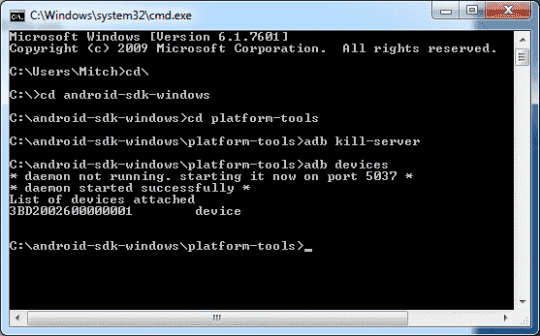
8. Stop ADB server with the adb kill-server command, then use the adb devices command. You should see the Kindle Fire listed.

You can now use Android development tools on the Kindle Fire like DDMS for taking screenshots.

Note: This tutorial assumes you have the Android SDK and platform tools installed.
Windows
1. Download and extract the Google USB Drivers.
2. Replace the android_winusb.inf file in the Google USB Driver folder with this one.
3. Connect your Kindle Fire. When it prompts you for a driver, point it to the Googleusb_driver folder. If Windows has already tried to find a driver, right-click My Computer/Computer then select Manage > Device Manager > Other Devices, then right-click Kindle and select Update Driver Software…
4. Hold down the Windows key and press R to bring up the run dialog and type %USERPROFILE% then click OK.
5. Open the .android folder.
6. Open the adb_usb.ini using Notepad or Wordpad.

7. Type 0X1949 at the end of the file, then save and close adb_usb.ini. (Note, some people are saying the ‘X’ has to be upper-case in order to work. See comments.)

8. Stop ADB server with the adb kill-server command, then use the adb devices command. You should see the Kindle Fire listed.
You can now use Android development tools on the Kindle Fire like DDMS for taking screenshots.

Mac & Linux
1. Navigate to ~/.android and open the adb_usb.ini file in a notepad appllication.
2. Type 0×1949 at the end of the file, then save and close adb_usb.ini. (Note, some people are saying the ‘X’ has to be upper-case in order to work. See comments.)
3. Stop ADB server with the adb kill-server command, then use the adb devices command. You should see the Kindle Fire listed.
Source: Technipages
Subscribe to:
Post Comments (Atom)


0 comments
Post a Comment