How to Install Snow Leopard on PC [Hackintosh]
Snow Leopard has arrived and we know how Important is it for you to upgrade. The excitement of the OSx86 has risen to levels where every one needs to run the latest Mac OS X and Snow Leopard is but obvious.
Before you start – You should have an existing OSx86 running. Follow the Guide Here: Install OSx86 Mac on PC to do that.
In the following tutorial we will show you how can you can Install the latest Snow Leopard (build 10A432 GM release, the Retail version) on your PC which has existing MAC OS X 10.x.x running.
We need two disks. Why ? – Snow Leopard needs a Leopard Install — One HDD with Leopard already installed and Second hard disk for Snow Leopard.
Before you begin, download the pre-requisites -
- Tools – MediaFire RapidShare
- Kexts – MediaFire RapidShare
- Chameleon 2.0 + EFI 10 – MediaFire RapidShare
- Chameleon 1.0 + EFI 10 – MediaFire RapidShare
- Misc. – MediaFire RapidShare
- Mac OS X 10.6 Snow leopard Retail build 10A432 (As ususal, we won’t post links, google it)
Let’s Roll
Step 1. Preparing the New Disk -
Make sure you have connected your second “New” Hard Disk or Flash Drive
Boot into Leopard, launch Disk Utility from Spotlight. Partition your New disk with GUID partition scheme. Name the partition e.g. “New”. Now set yourself as the owner by running the following at drive’s Root.
sudo –s
chown 0:0 /Volumes/New

Step2. Installing DMG -
Now, Mount the Snow Leopard DMG File.

Next, Installer window will pop-up, click on the free space anywhere in window and press key sequence - CMD + Shift + G . A small window will appear on top of the existing window. Here, type “Mac OS X Install DVD/System/Installation/Packages/”, and Go.
In the next window, locate the “OSInstall.mpkg” and double click this package file to start Snow leopard Installation.
Note- Default “OSInstall.mpkg” works for GUID partitioned drive only. If you need to install on MBR, then google for Modified OSInstall.mpkg for MBR, download modified one and replace with default one.
Step 3. Customizing Install -
Go through the options and select your New drive. De-select all the stuff you don’t need like Printers, Languages, other drivers etc.. and wait for it to finish. It should take 10-20 minutes.
After its done installing, Don’t Reboot!
Now step 4. and onwards, we will install Bootloader and some important drivers (KExts), Patch DSDT and Install certain important system files, so, bear it with me.
Step 4. Installing BootLoader –
Unzip the Chameleon Bootloader, Install the “Chameleon-2-1.0-r431.pkg“ 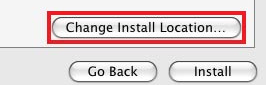 and then “Chameleon v2 Snow Leopard Support.pkg“ to the
 New Drive
 and then “Chameleon v2 Snow Leopard Support.pkg“ to the
 Note - If Snow Support Package Shows an Error, Then Follow Step 5.
IMPORTANT – If Chameleon 2.0 gives you Kernel Panics then try reinstalling with Chameleon 1.0
Step 5. If you are using PCEFI bootloader on your existing OSx86 system then “Chameleon v2 Snow Leopard Support.pkg” will NOT serve the purpose.
In this case, you have two options:
Option 1. Either install the “Chameleon-2-1.0-r431.pkg” over your current 10.5.x Installation then reboot and do the process again (from Step 1). or
Option 2. Launch the “ShowAllFiles“ (included in “Tools”) and click Show. Then Navigate to the root of your New Drive
Step 6. Patching DSDT -
From the downloaded Tools, Open the DSDT Patcher. Select “Darwin/Mac OS X” in Operating System, then select DSDT Patch in options and before hitting the Run DSDT Patcher button make sure to change the destination to “New” Drive.
Step 7. Installing KExts (Drivers)-
this assumes that you had downloaded all Kexts that might be needed for your system’s compatiblity. Place all the “kext files” in ”/New/Extra/Extensions”, and copy the Extensions folder in Extra to the desktop, and drag it to “Kext Utility“. “Kext utility” will actually repair your permission and generate a new Extension.mkext. Now, Move the Extensions folder and the extension.mkext back to “/Snow/Extra“
Step 8. Configuring boot.plist with EFiStudio -
Launch EFiStudio and look for your Display/Video Card through the drop down menu. Click add device and you will see some numbers, copy them.

Add the following XML to your com.apple.boot.plist in /New/Extra.
Save and Exit. Put the SMBios.plist into /New/Extra.
Update: Step 9 added
Step 9. If you added any driver kext to /New/System/Library/Extension, This step will rebuild the Extensions.mkext cache while booted in Snow Leopard. Reboot and go to Single User mode by typing the flag -x32 –s
Type the following commands:
/sbin/fsck -fy
/sbin/mnt -uw /
kextcache -v 1 -t -m /System/Library/Caches/com.apple.kext.caches/Startup/Extensions.mkext /System/Library/Extensions/
/sbin/mnt -uw /
kextcache -v 1 -t -m /System/Library/Caches/com.apple.kext.caches/Startup/Extensions.mkext /System/Library/Extensions/
Now Reboot and Fall in Love with the Snow Leopard -

Tip: In case you need quick assistance, contact me on Twitter: @ahsantasneem
UPDATE 1.
Basic Troubleshooting Guide
As promised, I added this section to give out better troubleshooting in case of any issues you might have come across.
For those who are getting Kernel Panics try to boot in 32 bit Mode + Safe mode using following Boot flag.
-x32 –v –x -f
Kernel Panic (IOATAFamily.kext) – Go to your New HDD , navigate it through /System/Library/Extensions and delete IOATAFamily.kext or simply replace IOATAFamily.kext with a patched kext from your Leopard installation or from netkas. If that fails , simply delete this kext. You’ll lose ATA support , however it would still install on your SATA drives. Just make sure its set to AHCI instead of IDE
Generic Kernel Panic on CPU – This problem is related with Chameleon V2. Its recommended for you to use PC_EFI v9 with a patched boot file.
Kernel Panic (generic CPU error) - It occurs if you have an Atom processor or some of the very old boards. The only way to fix it by using PC_EFI v9. Its kind of simple to do , all you have to do is download this installer and boot file for Snow Leopard. Its bit old school. To do this firstly , you’ll have to download PC_EFI v9 installer and this boot file from it. Install this boot loader to yourUSB Drive
Kernel Panic (generic CPU error) - It occurs if you have an Atom processor or some of the very old boards. The only way to fix it by using PC_EFI v9. Its kind of simple to do , all you have to do is download this installer and boot file for Snow Leopard. Its bit old school. To do this firstly , you’ll have to download PC_EFI v9 installer and this boot file from it. Install this boot loader to your
Another thing which I’ve noticed that it occurs when you do a -f. I think its related to permissions of the kext. Do refer to the guide up on how to generate extensions.mkext for both /Extra and /System/Library/Extensions and how to fix permissions
Reboot loop – It clearly means your processor is not supported for instance if you’re like me , still on a Pentium D. For this you’ll have to grab a patched mach_kernel.
CMOS Bug – If you get an error on BIOS after you’ve installed Snow Leopard (this includes BIOS settings have changed or other strange BIOS errors) This is a known issue and it requires your DSDT to be patched. Again you can check out the guide below which I’ve included on how to fix it
Fix Permission Error in Disk Utility. This is caused when Snow Leopard is installed from Leopard.
Disk Utility Permission fix error – If you get this error in Disk Utility , “ No Installer packages can be found for this disk” whenever you want to verify permission and fix permission. This is caused when you run Snow Leopard installer within Leopard itself. Its a simple fix. You’ll have to re-run BSD.pkg , it could be found in /Volumes/Mac OS X Install DVD/System/Installation/Packages or /Volumes/OSX86/System/Installation/Packages . Just run it and voila it should be fixed ! Now you can use Disk Utility to repair permissions !
UPDATE 2. More Troubleshooting Tips
- If you are stuck on Waiting for DSMOS then simply delete the DSMOS kext in Snow/Extra/Extensions but make sure you must have FakeSMC kext.
- If you are stuck on RTL8169E error: Disable Hardware LAN in your BIOS and boot again. I’m making a list of it, so stick with us.
- If you have an IDE drive or your laptop contains IDE drive then Install AppleIntelPIIXATA.kext by Netkas to make your ATA/IDE work in Snow Leopard. This kext is useful for ICH6/7/8/9/10 with ahci disabled and for lappies too. This kext also helps IOATAFamily related error causing Kernel Panic.
UPDATE 3: Replacing MACH_KERNEL (for Pentium D, Celeron, P4)
Replacing mach_kernel with a patched mach_kernel (required for Intel Pentium D/Celeron D/Pentium 4 with SSE3 or AMD processors with SSE3)
By default , vanilla kernel will not work on these processors , its because its not based on Intel Core micro-architecture series. Thus resulting a reboot. To fix this modbin has bin-patched (aka binary patched) the Vanilla kernel , so that it doesn’t perform any checks on CPU type. So it would boot on all CPUs regardless if its AMD or Intel. Keep in mind that. You may grab the patched kernel from here (for Intel Pentium D/Pentium 4 with SSE3/Celeron D with SSE3) and if you’re using AMD kernel , grab test7 by modbin
For SSE2 support , you’ll have to wait till Apple releases the source code to kernel and wait for someone to patch it and make it available for SSE2 users. This goes the same for AMD users and Intel Pentium 4/D users with 64-bit support , as it has to be patched to enable 64-bit support on these processors. For AMD users , there is a special guide , alternatively do scroll below and read. You’ll have to patch binaries (CPUID fix). However , even if there is SSE2 support for Snow Leopard’s patched kernel , its going to be very slow on your pentium 4/M with SSE2. Its highly not recommended to upgrade if you’re still on a Pentium 4/M , not to mention that Apple has dropped legacy support from Tiger and leopard , that may not allow older Pentium M (laptops) and Pentium 4 (Desktops) to work !
UPDATE 4. Install on AMD (64×2, others)
The base procedure remains the same, all you have to do instead is use Chameleon rc 2.640 pkg. and PCEFI V10, DSDT patch, Some kexts and Modbin Kernel.
- Modbin Kernel, Tools, Kexts, Chameleon 2.0 And Boot file Download Here
- SMBios.plist Download Here
If you have any issues, refer to this one
Update 5: Wifi driver
For Fixing WiFi: Intel 3945 Wireless Driver for Snow Leopard
Version History:
1. Added Step 9, Basic Troubleshooting
2. Added Support for Flash Drives.
3. More Troubleshooting Tips
4. Replacing MACH_KERNEL
5. AMD Install Support
Tip: In case you need quick assistance, contact me on Twitter: @ahsantasneem
Related Articles
[Mac OSx86] 10.4.8 VMware Installation Guide
How To - Install Mac OS X Leopard OSx86 on PC Dual Boot Windows 7, Vista in 9 Easy Steps
Hardware Compatibility List (HCL) - OSx86
Subscribe to:
Post Comments (Atom)


0 comments
Post a Comment